The blog entries might be getting a bit repetitive at this point, as the two previous ones were also about o3DS repairs, but one coincidence led to another coincidence and I ended up with another black o3DS at my dumb little table, so I might as well once again document the repairs I did to it.
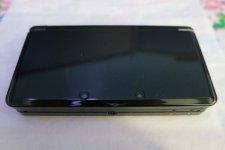
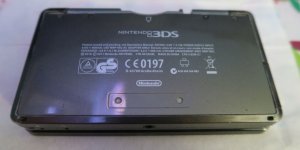
And this time it won't be another 3DS that stays in my collection, but a repair I did for a long-time friend of mine, since I was going out of the country twice last month. It almost becomes a problem to tell it apart from my own, eternally-living o3DS on the outside, if not for the missing serial number label and crack in the top part of the shell. I originally intended to do the repair on the spot while visiting my friend, but two way too tight screws below the battery cover stopped me from doing that, so I took the 3DS with me back home to do something about that, and just bring it back fixed two weeks later. So, if not for those screws not wanting to move the slightest bit and just stripping themselves, you wouldn't be seeing this blog entry, I guess. I fear that this is just going to become more common on the original models as the cheap materials age. Isn't it insane how a lot of the original o3DS units are more than 11 years old at this point? Even this forum probably now has members that are younger than the oldest 3DS units. Well, maybe now's not the right time for feeling sad and old, despite not being that old myself, but now I can't stop myself from thinking about the memories of buying my first 3DS (the same black o3DS mentioned before), expanding my collection (not updated) of other DS and 2/3DS systems and falling in love with those cute little things, and getting excited for new 3DS games that were still being made and still of relatively high quality, compared to a lot of the disappointment that releases nowadays on a certain newer console that I really dislike and we shall not name...
Ehm, that's probably enough of that for now, or I'll be forced to changed the blog's title to "IC's dumb and depressing thoughts" or something. Haven't even mentioned what was wrong with the 3DS yet.
Well, it might be a good idea to prepare for a bit of a disappointment:
- L and R buttons
- Touch screen
- The battery, which I am not going to replace since I was unable to source a replacement and it is easy enough to be replaced by anyone without special skills
- 3D slider. Also not going to do anything about that, it's way too tedious when it was just disabled with Parental Controls anyway.
Did I mention something about making repetitive blog entries? Yeah, sounds just like the Japanese o3DS repair, but with less steps, doesn't it? But oh well, I've already taken the photos at the time of repairing it, so like I said, might as well document it somehow...
Those two screws were the first thing I had to deal with when I got the thing home, unfortunately nothing was able to save those screws, not even my favorite "hammer method", so I had to resort to some more extreme methods of getting them out.
I ended up buying some random 2mm drill bit at the electronics/hardware exchange, despite not even having a drill at home, and started playing around with it and those two screws by hand. While I didn't truly "drill" through the screws, the stress on them seemed to be enough for the plastic that holds onto the screw to break off from the bottom part of the shell. Well, that's free now, "problem solved". No new screws will ever be going back into those two spots, and it's not like that causes any problem with the device not falling apart when it's put back together, but it still bothered me a bit that I had to "destroy" the original plastic part... While I do think it's better for the system to be repaired and usable again, rather than continuing to rot away due to the issues it has, it still didn't stop me from having thoughts of future owners in 20-30 years discovering the 3DS unit once again and then screaming at the idiot who destroyed the original part in such a small and insignificant way, when, just by using better tools and methods those decades ago, it otherwise might have been relatively perfect in a future world of more old brittle plastics, less working 3DS units, and less available original parts in good condition.
But for now, that's a problem solved and allows me to continue with the repair (which I also obviously couldn't stretch out into taking months). I might have been going too overboard with my thoughts again.
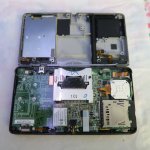
Here's the unit opened up, you can kind of see the remains of those two screws at the top. I continued with the typical disassembly, disconnecting most modular components from the motherboard, nothing special to report there, thankfully the internal screws usually don't cause any issues, and even if they did, they're much more accessible which allows for more easier methods of removing stripped or stuck screws. I just hope that the situation with that also won't get worse in the future. No problems with this unit though.
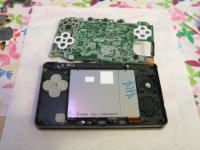
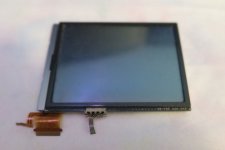
Motherboard removed, bottom screen can be accessed now. Once you get here, it's a very good idea to clean out the individual buttons and in general other pieces that you normally don't have easy access to. Especially considering that it might be a >11 year old unit, used by multiple owners over the years. Now it's just a matter of getting the screen outside and separating the three main pieces. Display panel, touch panel, and the plastic frame matching the color of the 3DS. The satisfying peel of the foils off the new touch panel comes again.
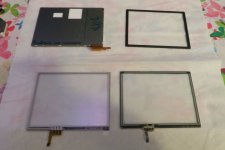
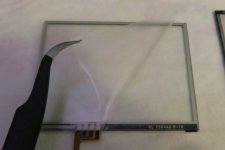
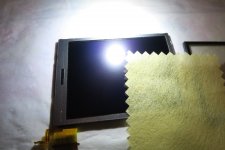
The most tedious part comes as well... sandwiching the touch panel back with the display panel without any tiniest noticeable pieces of dust remaining between them. Took me at least 30 minutes of playing with a cloth and strong direct lightning to get a good result. Sigh, it'd be nice to have a proper dust-free chamber for working on this stuff, maybe even some DIY solution, but even then, where would I find the space and money for that... Can't really be worth it unless I would start doing this professionally as a service.
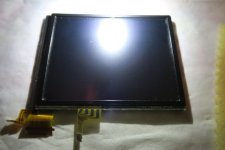
But with enough patience, it's possible to get it just right even in a typical home environment. The dust particles you're seeing on this photo are ones that already got on the top just after closing the two halves up for good and wiping the top as well. Well, it's surprising how little words it takes to describe this when writing a blog entry. In the real world it involves a lot more anger and feels like forever for sure.
Once that was done, I just popped the entire screen back in place, made sure to align the two halves properly beforehand so there were no alignment issues with that when popping it back in. Cleaned the buttons and everything there below the motherboard as well. Then it's just mostly a process of putting the motherboard back in and doing everything in reverse.
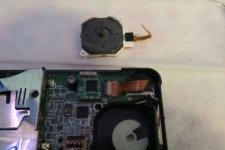
The circle pad also deserved quite a good cleaning. The camera ribbon is also an important thing to take into consideration on this model (not sure if it's just an o3DS specific issue or not), even if it looks fully inserted to the eye, it might not in fact be, and the cameras might end up not working correctly. It's important to test them before putting the unit fully back together (unless you really don't care about having working cameras). It can take a few tries of reseating that ribbon cable for it to be right, but I don't find it to be as tedious as some people might say. Can't remember if it didn't even work on the first or second try when repairing this unit.
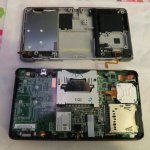
At this point I was pretty much done with the repair. Only replacing the L and R button cables was left to do at the end, which takes just around 5 minutes if not less to do. The unit can still be fully put back together without a problem, even with those two non-functioning screws. I made sure to not overtighten the screws too much, hopefully that'll save someone the trouble with them in the future.
And that's pretty much done. The unit is now usable again and will hopefully last at least another decade. It was even used on the same day that I brought it back to my friend, since it turns out that they didn't have the game we wanted to play on their newer 3DS system. Here are the final photos:
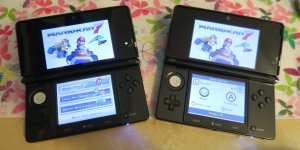
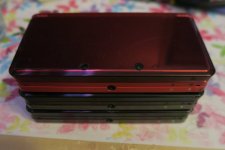
If you can tell the units apart, of course. Ha ha.
Thanks for reading this "repetitive" (and probably a bit long) entry. The next repairs should be more interesting - I do have some other DS and 3DS systems that are still waiting for my (and more interesting) repairs. But I cannot say when that will come, I haven't been able to find much "time" and motivation for them in the recent months. One of them might even be waiting almost a year at this point.
Interested to hear your thoughts on the original plastic part issue as well.


And this time it won't be another 3DS that stays in my collection, but a repair I did for a long-time friend of mine, since I was going out of the country twice last month. It almost becomes a problem to tell it apart from my own, eternally-living o3DS on the outside, if not for the missing serial number label and crack in the top part of the shell. I originally intended to do the repair on the spot while visiting my friend, but two way too tight screws below the battery cover stopped me from doing that, so I took the 3DS with me back home to do something about that, and just bring it back fixed two weeks later. So, if not for those screws not wanting to move the slightest bit and just stripping themselves, you wouldn't be seeing this blog entry, I guess. I fear that this is just going to become more common on the original models as the cheap materials age. Isn't it insane how a lot of the original o3DS units are more than 11 years old at this point? Even this forum probably now has members that are younger than the oldest 3DS units. Well, maybe now's not the right time for feeling sad and old, despite not being that old myself, but now I can't stop myself from thinking about the memories of buying my first 3DS (the same black o3DS mentioned before), expanding my collection (not updated) of other DS and 2/3DS systems and falling in love with those cute little things, and getting excited for new 3DS games that were still being made and still of relatively high quality, compared to a lot of the disappointment that releases nowadays on a certain newer console that I really dislike and we shall not name...
Ehm, that's probably enough of that for now, or I'll be forced to changed the blog's title to "IC's dumb and depressing thoughts" or something. Haven't even mentioned what was wrong with the 3DS yet.
Well, it might be a good idea to prepare for a bit of a disappointment:
- L and R buttons
- Touch screen
- The battery, which I am not going to replace since I was unable to source a replacement and it is easy enough to be replaced by anyone without special skills
- 3D slider. Also not going to do anything about that, it's way too tedious when it was just disabled with Parental Controls anyway.
Did I mention something about making repetitive blog entries? Yeah, sounds just like the Japanese o3DS repair, but with less steps, doesn't it? But oh well, I've already taken the photos at the time of repairing it, so like I said, might as well document it somehow...
Those two screws were the first thing I had to deal with when I got the thing home, unfortunately nothing was able to save those screws, not even my favorite "hammer method", so I had to resort to some more extreme methods of getting them out.
I ended up buying some random 2mm drill bit at the electronics/hardware exchange, despite not even having a drill at home, and started playing around with it and those two screws by hand. While I didn't truly "drill" through the screws, the stress on them seemed to be enough for the plastic that holds onto the screw to break off from the bottom part of the shell. Well, that's free now, "problem solved". No new screws will ever be going back into those two spots, and it's not like that causes any problem with the device not falling apart when it's put back together, but it still bothered me a bit that I had to "destroy" the original plastic part... While I do think it's better for the system to be repaired and usable again, rather than continuing to rot away due to the issues it has, it still didn't stop me from having thoughts of future owners in 20-30 years discovering the 3DS unit once again and then screaming at the idiot who destroyed the original part in such a small and insignificant way, when, just by using better tools and methods those decades ago, it otherwise might have been relatively perfect in a future world of more old brittle plastics, less working 3DS units, and less available original parts in good condition.
But for now, that's a problem solved and allows me to continue with the repair (which I also obviously couldn't stretch out into taking months). I might have been going too overboard with my thoughts again.

Here's the unit opened up, you can kind of see the remains of those two screws at the top. I continued with the typical disassembly, disconnecting most modular components from the motherboard, nothing special to report there, thankfully the internal screws usually don't cause any issues, and even if they did, they're much more accessible which allows for more easier methods of removing stripped or stuck screws. I just hope that the situation with that also won't get worse in the future. No problems with this unit though.


Motherboard removed, bottom screen can be accessed now. Once you get here, it's a very good idea to clean out the individual buttons and in general other pieces that you normally don't have easy access to. Especially considering that it might be a >11 year old unit, used by multiple owners over the years. Now it's just a matter of getting the screen outside and separating the three main pieces. Display panel, touch panel, and the plastic frame matching the color of the 3DS. The satisfying peel of the foils off the new touch panel comes again.


The most tedious part comes as well... sandwiching the touch panel back with the display panel without any tiniest noticeable pieces of dust remaining between them. Took me at least 30 minutes of playing with a cloth and strong direct lightning to get a good result. Sigh, it'd be nice to have a proper dust-free chamber for working on this stuff, maybe even some DIY solution, but even then, where would I find the space and money for that... Can't really be worth it unless I would start doing this professionally as a service.

But with enough patience, it's possible to get it just right even in a typical home environment. The dust particles you're seeing on this photo are ones that already got on the top just after closing the two halves up for good and wiping the top as well. Well, it's surprising how little words it takes to describe this when writing a blog entry. In the real world it involves a lot more anger and feels like forever for sure.
Once that was done, I just popped the entire screen back in place, made sure to align the two halves properly beforehand so there were no alignment issues with that when popping it back in. Cleaned the buttons and everything there below the motherboard as well. Then it's just mostly a process of putting the motherboard back in and doing everything in reverse.

The circle pad also deserved quite a good cleaning. The camera ribbon is also an important thing to take into consideration on this model (not sure if it's just an o3DS specific issue or not), even if it looks fully inserted to the eye, it might not in fact be, and the cameras might end up not working correctly. It's important to test them before putting the unit fully back together (unless you really don't care about having working cameras). It can take a few tries of reseating that ribbon cable for it to be right, but I don't find it to be as tedious as some people might say. Can't remember if it didn't even work on the first or second try when repairing this unit.

At this point I was pretty much done with the repair. Only replacing the L and R button cables was left to do at the end, which takes just around 5 minutes if not less to do. The unit can still be fully put back together without a problem, even with those two non-functioning screws. I made sure to not overtighten the screws too much, hopefully that'll save someone the trouble with them in the future.
And that's pretty much done. The unit is now usable again and will hopefully last at least another decade. It was even used on the same day that I brought it back to my friend, since it turns out that they didn't have the game we wanted to play on their newer 3DS system. Here are the final photos:


If you can tell the units apart, of course. Ha ha.
Thanks for reading this "repetitive" (and probably a bit long) entry. The next repairs should be more interesting - I do have some other DS and 3DS systems that are still waiting for my (and more interesting) repairs. But I cannot say when that will come, I haven't been able to find much "time" and motivation for them in the recent months. One of them might even be waiting almost a year at this point.
Interested to hear your thoughts on the original plastic part issue as well.
