

Tutorial
Updated
How to get gbaemu4ds up & running on your nds THE CORRECT WAY
//Forgive the irritating format, I was immature when I wrote this


How to get gbaemu4ds set-up & running on your nds THE CORRECT WAY
~Introduction~
Gbaemu4ds was developed by ichichfly in 2010(or was it 2011?) as a project for the homebrew bounty contest. Though he was doubted at first, but he managed to get this going…
Thanks to his efforts , this emu has come a long way from managing to play select homebrew at 1-2 fps to now running Pokemon Fire red at full speed with sound(and maybe cheats).
However, seeing the popularity and its ability to run a decent number of games, more and more people continue to try the emu, but only a few manage to run it the correct way. I have been following this thread for a LONG time and have observed that almost halve the no. of posts I’ve seen were àHow-do-i-set-it-up? So now as my first (useful) contribution to this community, I’ve decided to write this guide/ tutorial that you’re reading. Let’s get this started.
Note: For this tutorial I’m using the version Apha 2 Fix 4
~Requirements~
Nintendo DS/3DS {you’re kidding right?}
A homebrew capable flashcart
Basic knowledge of scrolling though buttons
#1 SET-UP
1.I suppose you have already downloaded gbaemu4ds, so the zip that you downloaded must be like this-
2.Now extract the contents in to you µsd, delete the file ’patch.pat’
Note: No one could get patch.pat to work(I think)
3. . In case you are using an acekard, keep the folder ‘_rpg’, else you can delete it.
Copy your games and proceed to the next stage.
#2 LOADING/RUNNING THE EMU
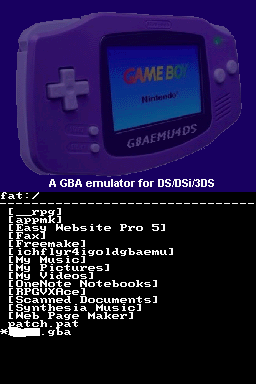
1.Go through the menu of your cart and run “hbmenu.nds”(you can rename it), the screen that would appear (in case the emu loads successfully) would be like this-
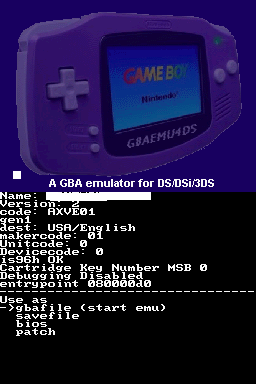
2.Navigate to your gba file and press A, this screen that you’ll encounter should be like this-
3.Press A again and again and again…..and again till you reach this screen-
Note: I’ll come back to the other screens later.
This screen that you see above is one of the most important screens you’ll ever see in this emu;
This screen is where you can choose various loaders, that will determine how you game will load (like with sound, w/o sound, scaling etc.) The loader that is recommended for most commercial games is
advirqsound for sound
advirq for no sound( has better compatibility with games)
---
Choose a loader and press A and the game should load.
SAVING and loading Save files
For saving your progress in a game, after you’ve saved in game, you need to press the Y button, this is important for SAVING your SAVE file (Really!!!)
LOADING YOUR SAV FILES
Follow the same process as (2) but instead of selecting your game, select your sav file and press A
And then choose the option ‘savefile’ when prompted in ~Use as-~. Then repeat (2).
Now the other screens
(May not be in order)
1. LCD SWAP
LcdswapàDecides whether the game screen should be in the top or bottom screen (Do as instructed)
2.Save type chooser
The sav file chooser, depending on the type of your sav file choose the related save file type. This helps in compatibility and optimal performance.
3.Frame skip chooser
This is the frame skip chooser (I don't really have to explain this do I?)
4. Auto V-sync
Since a certain revision, ichfly introduced a new feature, AutoVsycline; this feature supposedly detects the optimal vsyncline value for this emu.
Last edited by raystriker,


