- Joined
- Mar 25, 2021
- Messages
- 680
- Trophies
- 0
- Age
- 34
- Location
- The Best State on The Best Coast
- XP
- 826
- Country

Hey all, I figured to kick off some more discussion topics on here to get things more lively. Who knows if it works or not but this is something I worked on some time ago, and figured why the hell not share it.
Repairing the Apple Macintosh SE/30
Awhile back in 2019 I found myself getting my hands on a few Apple systems from a gentleman a hour or so away from me. I found his post on CL and the price for the systems were more than reasonable (3 Apple Macs + accessories and software for only a hundred is a steal no matter how you look at it!) My main reason for picking up the lot however was that one of the 3 Macs was an SE/30, which aside from it being a pretty hard to find system its also one of the (if not the most) powerful classic all in one Macintosh computers of its time. With the potential to upgrade it to 128MB RAM which was almost unheard of in those days. This system can be pushed all the way up to OS 8.1 with some additional effort if desired. It was also one of the only few systems that can use Apple's experimental A/UX UNIX based Operating system which I was curious in trying out at the time.
Once I got my hands on the systems I spent some time doing research on recapping knowing the issues the SE/30 had early on from reports of other owners time is usually not a thing to waste on these as the capacitors on these are infamous for their leaking and causing issues with the boards. The capacitors were early surface mount caps as well which would provide me with a new challenge in trying to remove the old caps. The other issue to worry about is the internal battery which might have either leaked and/or exploded at some point causing great damage internally to the system as well. With both of these issues known and common among this generation of Apple hardware it makes finding an SE/30 that has not been exposed to at least one of these problems very uncommon to rare.
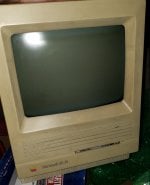
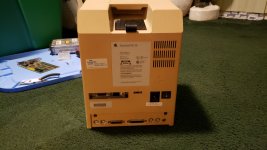
Interestingly enough the system had a few oddities to it, including some non standard lock that was glued at the top of the unit. The person I did buy this from did say it came from a school of some sort, so its possible this was a type of anti-theft method. Aside from this what is also noteworthy is the fact there is a network card installed in the system!
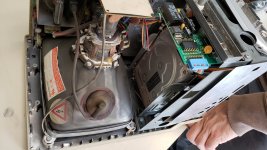
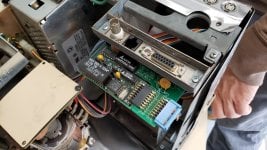
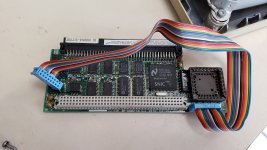
A closer look inside the system shows that the network card is an Asante MacCon Ethernet Network card! Also a 40MB Quantum ProDrive Hard Drive as well.
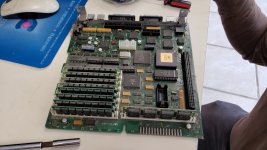
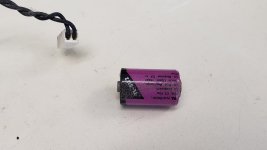
Finally we have a look at the motherboard, quick thing to notice was the battery did not explode yet! It was pulled out of there before we did anything else. Aside from the board itself being dusty there was no sign of damage anywhere that can be determined. There was some signs of the caps starting to leak but this would be taken care of.
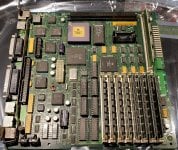
A closer look of the board after cleaning off the dust on the motherboard Only two of these capacitors are through hole, the rest are all Surface mount. Also that CPU is not only beautiful, but its a telling design of this being an early revision motherboard as well. Closer look at this with the model number of the system puts this in the first few months of production! Its slightly older than myself by a couple of months!
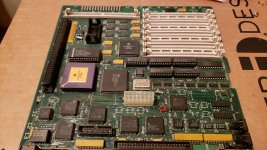
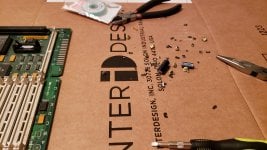
With some advice from a seasoned board repair expert and with extreme carefulness I removed the surface mount caps by cutting the cap off from the top using a wire cutter. Doing this usually will free the cap itself from the board while leaving the leads of the cap behind on the board. This will allow you to safely solder off the old cap leads without the cap in the way. A lot of people suggest to carefully twist the surface mount cap off however most experienced folk in this field warn you against this especially since doing so will cause at great risk of pulling off the solder pads to the motherboard. IT is imperative to NOT do this as it will make repair far more difficult for you if not outright impossible.
Shortly after this I cleaned off the motherboard using 91% Iso Alcohol which helped remove a lot of the dust and early electrolytics on the board.
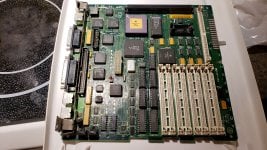
It already looks better than it did before!
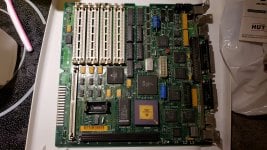
Finally the came the point of soldering on the new parts. The through hole caps are always easiest to get done but this was my first experience with Surface Mount caps, I honestly doubt my skill in doing something this new on something so old and uncommon that I was afraid I was going to screw something up here. If nothing else it would be a learning experience of what to do and not to do. Also before I forget to mention, The caps I replaced with are Ceramic which do not leak over time like Electrolytic ones do (however Ceramics will pop if something fails, albeit rarely).
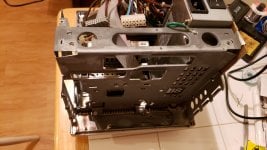
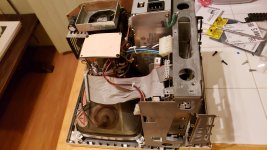
Cleaned up the inside case, checked the analog board for any issues and none seem to be present at the moment.
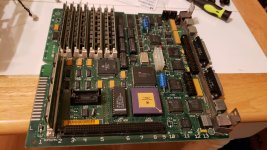
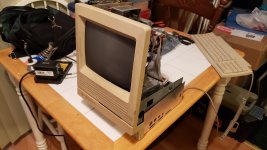
Sticks are back on the board, and everything is put in fine. I noticed the Floppy Drive had some issues and I excluded it from the test. If the board powers on fine and pops up as it should on screen, then I will attempt to test the hard drive that came with it next to see if that still lives!
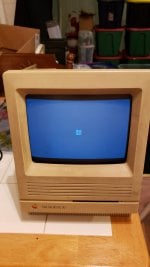
IT WORKS! Now to test the HDD
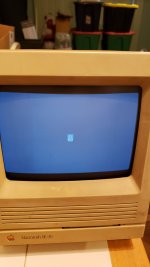
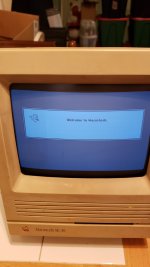
HARD DRIVE WORKS!
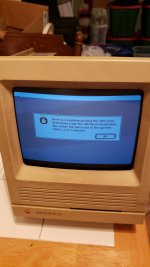
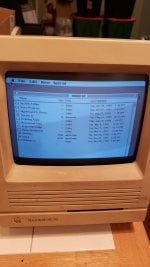
Shortly after start up this pops up, seems to have an old anti-virus running on it! Also it seems the system was used up until 1999! Impressive!
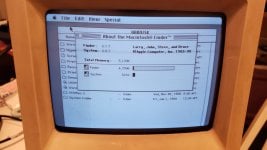
System was on 6.0.7
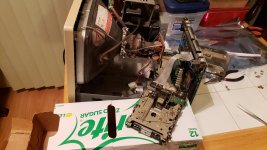
Since I tried the hard drive I would again try the floppy drive, only to see it not work as intended. With that failing I went to grab one of my parts Mac Classics and sure enough the floppy drive in that was essentially the same hardware. Plugging it in and testing it again with the board now out.
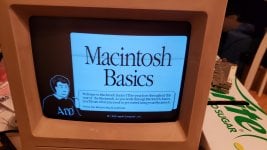
Sure enough it now works!
So with everything repaired and working perfectly now, I have my very own working SE/30. The repair was a trip, and while there were moments I were certainly sure I was going to screw it up some how, the end result was a happy surprise. I am happy to have restored this and to this day it still remains one of my favorite systems.
Hope this was a fun little thread. If anyone else has any repair stories feel free to post them in the group! If you have any questions about this repair go on and ask away!
Repairing the Apple Macintosh SE/30
Awhile back in 2019 I found myself getting my hands on a few Apple systems from a gentleman a hour or so away from me. I found his post on CL and the price for the systems were more than reasonable (3 Apple Macs + accessories and software for only a hundred is a steal no matter how you look at it!) My main reason for picking up the lot however was that one of the 3 Macs was an SE/30, which aside from it being a pretty hard to find system its also one of the (if not the most) powerful classic all in one Macintosh computers of its time. With the potential to upgrade it to 128MB RAM which was almost unheard of in those days. This system can be pushed all the way up to OS 8.1 with some additional effort if desired. It was also one of the only few systems that can use Apple's experimental A/UX UNIX based Operating system which I was curious in trying out at the time.
Once I got my hands on the systems I spent some time doing research on recapping knowing the issues the SE/30 had early on from reports of other owners time is usually not a thing to waste on these as the capacitors on these are infamous for their leaking and causing issues with the boards. The capacitors were early surface mount caps as well which would provide me with a new challenge in trying to remove the old caps. The other issue to worry about is the internal battery which might have either leaked and/or exploded at some point causing great damage internally to the system as well. With both of these issues known and common among this generation of Apple hardware it makes finding an SE/30 that has not been exposed to at least one of these problems very uncommon to rare.


Interestingly enough the system had a few oddities to it, including some non standard lock that was glued at the top of the unit. The person I did buy this from did say it came from a school of some sort, so its possible this was a type of anti-theft method. Aside from this what is also noteworthy is the fact there is a network card installed in the system!


A closer look inside the system shows that the network card is an Asante MacCon Ethernet Network card! Also a 40MB Quantum ProDrive Hard Drive as well.


Finally we have a look at the motherboard, quick thing to notice was the battery did not explode yet! It was pulled out of there before we did anything else. Aside from the board itself being dusty there was no sign of damage anywhere that can be determined. There was some signs of the caps starting to leak but this would be taken care of.

A closer look of the board after cleaning off the dust on the motherboard Only two of these capacitors are through hole, the rest are all Surface mount. Also that CPU is not only beautiful, but its a telling design of this being an early revision motherboard as well. Closer look at this with the model number of the system puts this in the first few months of production! Its slightly older than myself by a couple of months!


With some advice from a seasoned board repair expert and with extreme carefulness I removed the surface mount caps by cutting the cap off from the top using a wire cutter. Doing this usually will free the cap itself from the board while leaving the leads of the cap behind on the board. This will allow you to safely solder off the old cap leads without the cap in the way. A lot of people suggest to carefully twist the surface mount cap off however most experienced folk in this field warn you against this especially since doing so will cause at great risk of pulling off the solder pads to the motherboard. IT is imperative to NOT do this as it will make repair far more difficult for you if not outright impossible.
Shortly after this I cleaned off the motherboard using 91% Iso Alcohol which helped remove a lot of the dust and early electrolytics on the board.

It already looks better than it did before!

Finally the came the point of soldering on the new parts. The through hole caps are always easiest to get done but this was my first experience with Surface Mount caps, I honestly doubt my skill in doing something this new on something so old and uncommon that I was afraid I was going to screw something up here. If nothing else it would be a learning experience of what to do and not to do. Also before I forget to mention, The caps I replaced with are Ceramic which do not leak over time like Electrolytic ones do (however Ceramics will pop if something fails, albeit rarely).


Cleaned up the inside case, checked the analog board for any issues and none seem to be present at the moment.


Sticks are back on the board, and everything is put in fine. I noticed the Floppy Drive had some issues and I excluded it from the test. If the board powers on fine and pops up as it should on screen, then I will attempt to test the hard drive that came with it next to see if that still lives!

IT WORKS! Now to test the HDD


HARD DRIVE WORKS!


Shortly after start up this pops up, seems to have an old anti-virus running on it! Also it seems the system was used up until 1999! Impressive!

System was on 6.0.7

Since I tried the hard drive I would again try the floppy drive, only to see it not work as intended. With that failing I went to grab one of my parts Mac Classics and sure enough the floppy drive in that was essentially the same hardware. Plugging it in and testing it again with the board now out.

Sure enough it now works!
So with everything repaired and working perfectly now, I have my very own working SE/30. The repair was a trip, and while there were moments I were certainly sure I was going to screw it up some how, the end result was a happy surprise. I am happy to have restored this and to this day it still remains one of my favorite systems.
Hope this was a fun little thread. If anyone else has any repair stories feel free to post them in the group! If you have any questions about this repair go on and ask away!
